Walkthrough
Notebook Walkthrough
If you have not already done so, download and install the Tellurium notebook front-end for your platform (Windows, Mac, and Linux supported).
Basics
The notebook environment allows you to mix Python code, narrative, and exchangeable standards for models and simulations. When you first open the notebook, you will have a single Python cell. You can type Python code into this cell. To run the code:
- Press
shift+Enter, - Click the play button at the upper right of the cell, or
- Choose
Cell->Run Allfrom the menu.
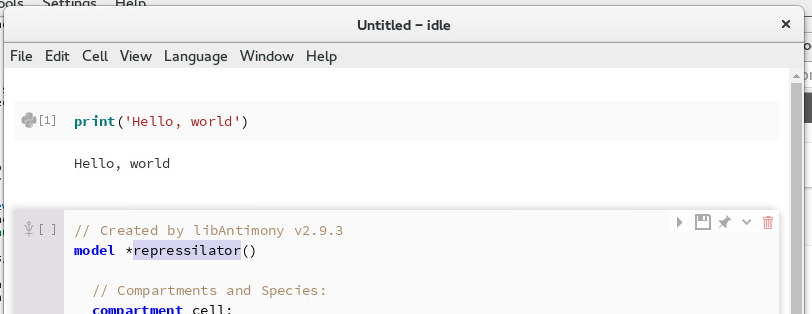
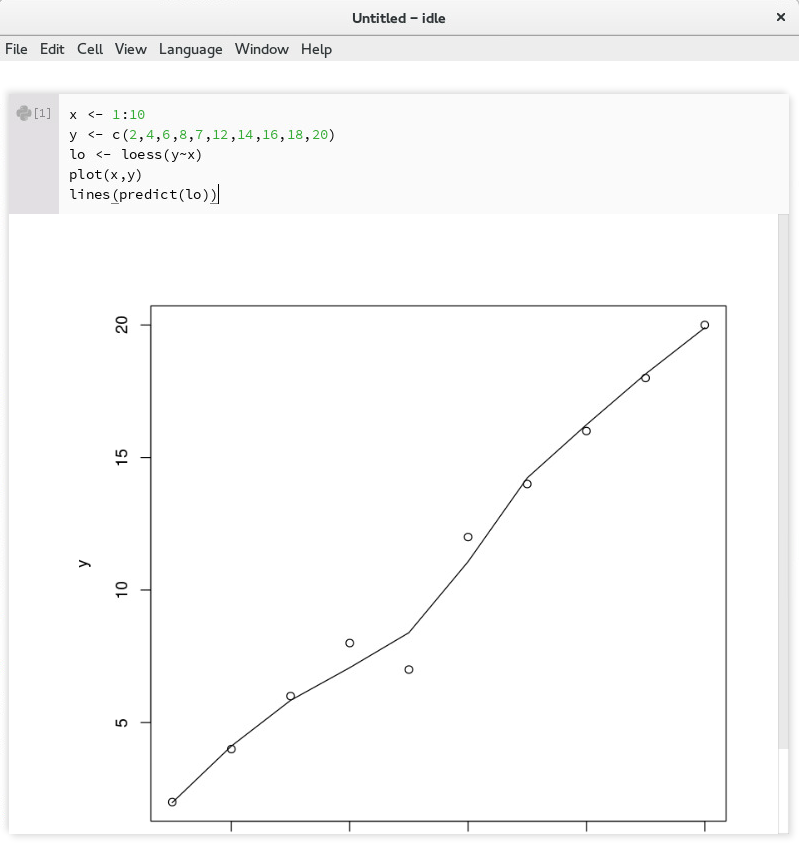
The output of running the cell will be shown beneath the cell.
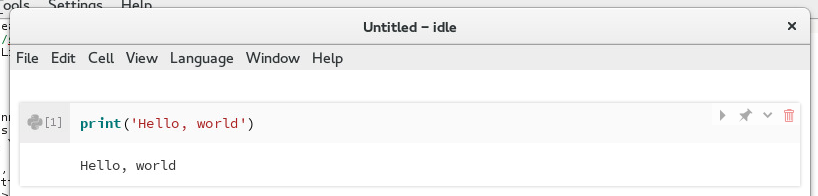
Output of running a Python cell
Creating Cells
You can add new cells by moving your cursor past the last cell in the notebook. You should see a menu with three options: New, Import, and Merge. Choose New to create a new cell. You will see four choices:
- New Python Cell
- New Markdown Cell (for creating narrative)
- New Model Cell (for SBML/Antimony models)
- New OMEX Cell (for COMBINE archives)
For now, select New Markdown Cell. Markdown cells allow you to place formatted text and hyperlinks in your notebook. For a review of Markdown syntax, please see this reference.
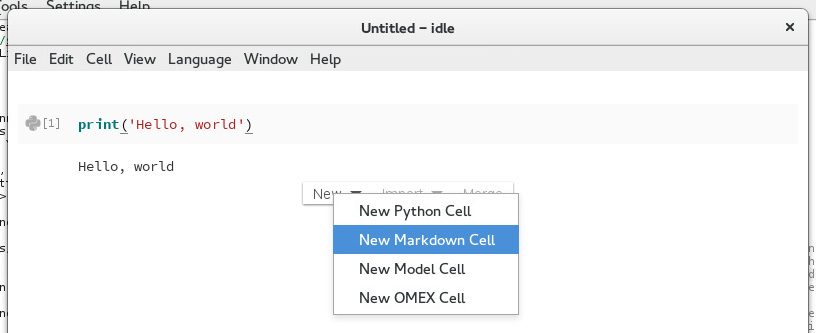
Creating a new Markdown cell
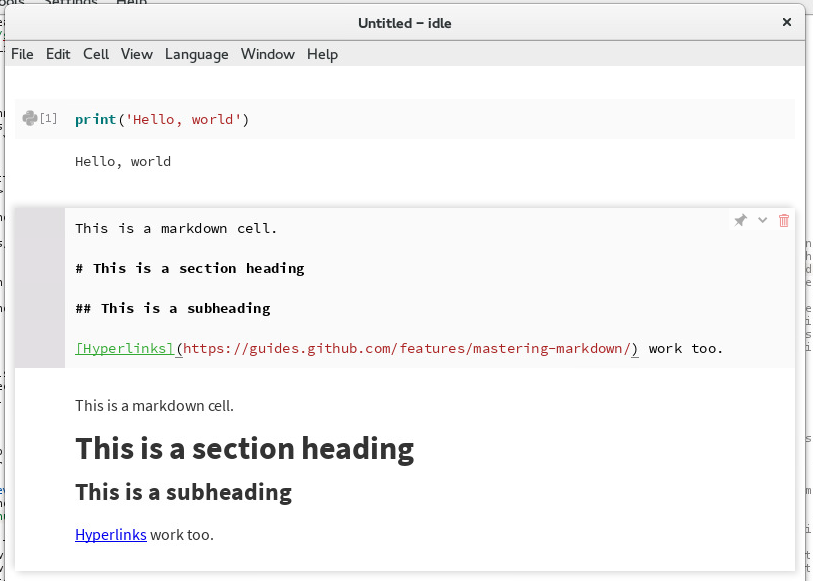
Editing a Markdown cell
SBML Cells
Unlike vanilla Jupyter, Tellurium allows you embed a human-readable representation of SBML directly in your notebook. To begin, first download the SBML for the represillator circuit from BioModels. Then, in the Tellurium notebook viewer, move your cursor past the last cell in the notebook and select Import -> Import SBML....
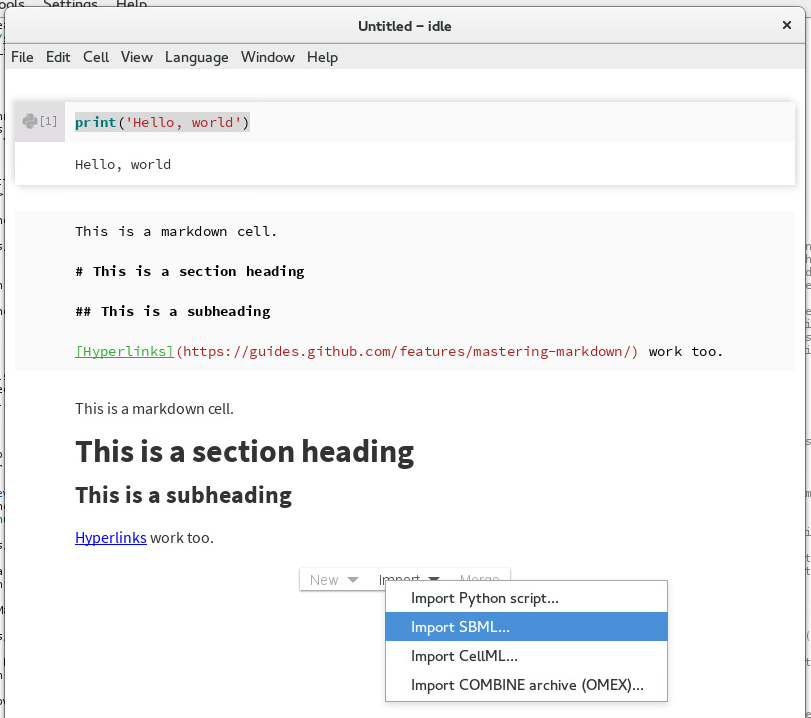
Importing an SBML model
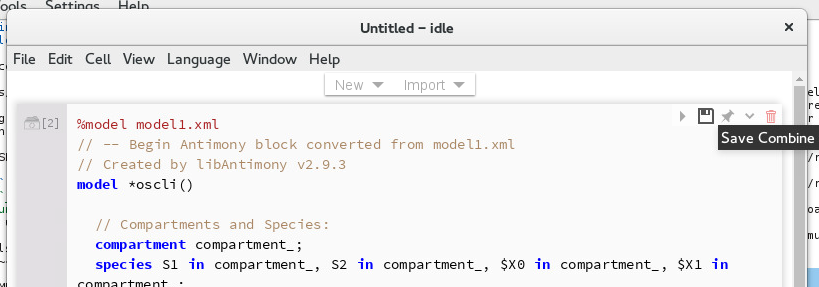
Navigate to the BIOMD0000000012.xml file that you downloaded and select it. A new cell will be created in the notebook with a human-readable representation of this model. The human-readable syntax is called Antimony, and you can find an extensive reference on the syntax here. For now, just change the name of the model from BIOMD0000000012 to repressilator.
Changing the name of the model
Now, run the cell. You should see confirmation that the model was correctly loaded and is available under the variable repressilator in Python.
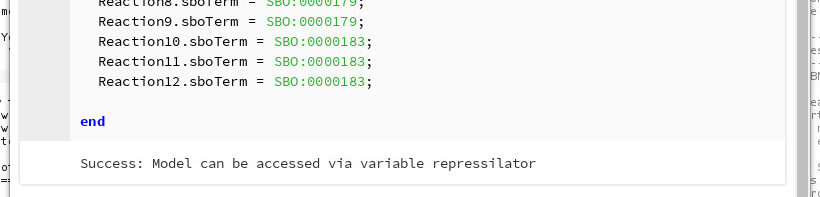
Running the SBML cell
After the SBML cell, create a Python cell with the following content:
repressilator.reset() # in case you run the cell again
repressilator.simulate(0,1000,1000) # simulate from time 0 to 1000 with 1000 points
repressilator.plot() # plot the simulation
After you run this cell, you should see the following simulation plot:
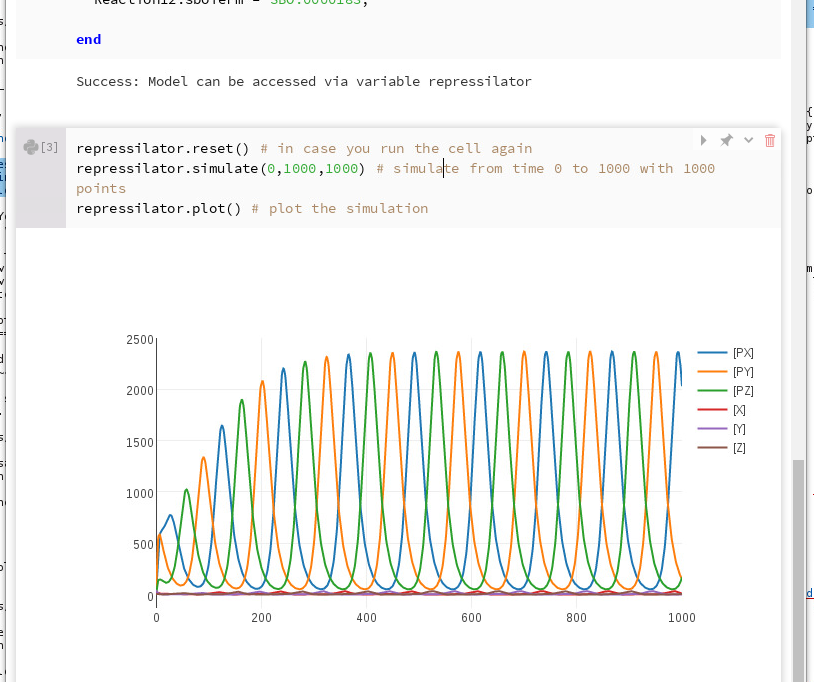
Simulating the SBML model
The repressilator variable is actually an instance of the RoadRunner simulator. Please see the official documentation for libRoadRunner for an extensive list of methods and options that can be used with RoadRunner.
You can also use ctrl+Space to open the auto-completion menu for a variable defined in a previous cell. This also goes for variables such as repressilator defined in SBML cells.
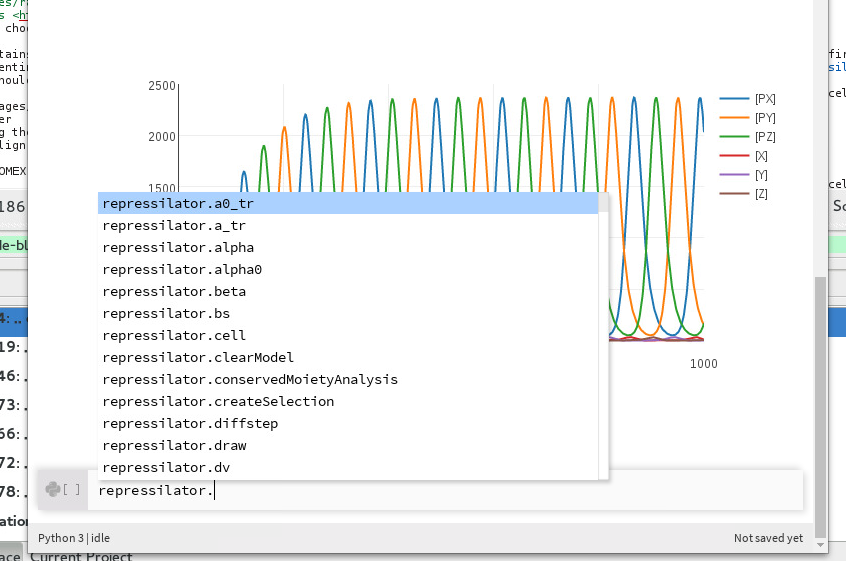
Showing all auto-completions for the repressilator RoadRunner instance
COMBINE Archive Cells
Another name for COMBINE archives is the Open Modeling and EXchange format (OMEX), which shows up in various Tellurium menus and functions. COMBINE archives are containers for various community standards in systems biology. They can contain SBML, SED-ML, CellML, and NeuroML. Tellurium supports importing COMBINE archives containing SBML and SED-ML.
To begin, download this COMBINE archive example (originally from the SED-ML Web Tools). In the Tellurium notebook viewer, move the mouse past the last cell until the Cell Creator Bar appears and choose Import -> Import COMBINE archive (OMEX)....
This archive contains an SBML model and a SED-ML simulation. The simulation has a forcing function (representing external input to the system) in the form of a pulse. After running this cell, you should see the following output:
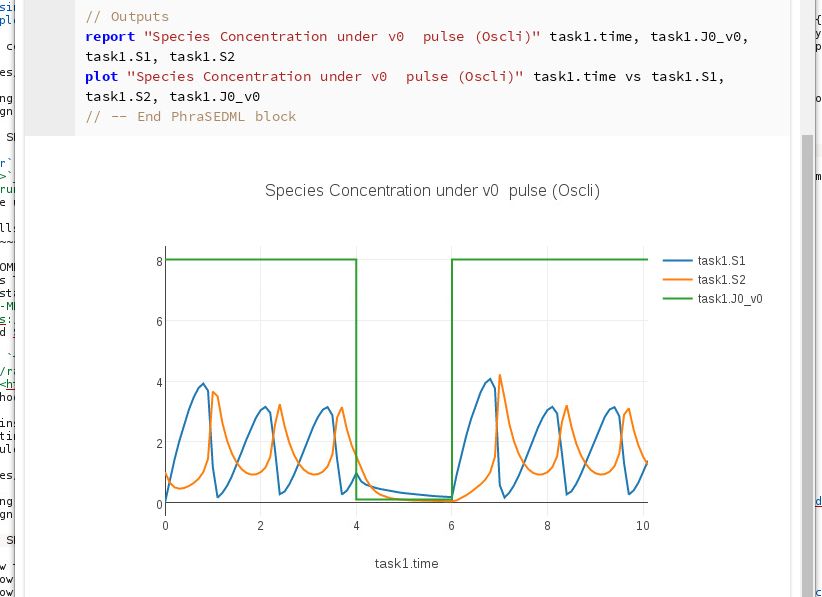
Running the OMEX cell
As a demo of Tellurium’s COMBINE archive editing functionality, we can change the duration of the pulse. Change the following line:
task1 = repeat task0 for local.index in uniform(0, 10, 100), local.current = index -> piecewise(8, index < 1, 0.1, (index >= 4) && (index < 6), 8), model1.J0_v0 = current : current
To:
task1 = repeat task0 for local.index in uniform(0, 10, 100), local.current = index -> piecewise(8, index < 1, 0.1, (index >= 4) && (index < 10), 8), model1.J0_v0 = current : current
In other words, index < 6 was changed to index < 10. Run the cell:
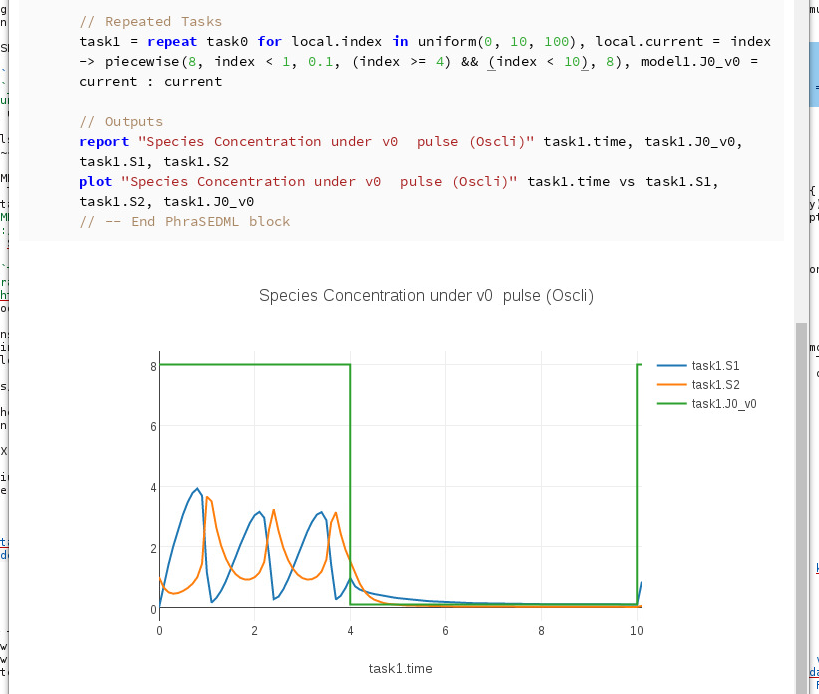
Editing the OMEX cell
You can re-export this cell to a COMBINE archive by clicking the diskette icon in the upper right:
Exporting the COMBINE archive
Find/Replace in Notebook Cells
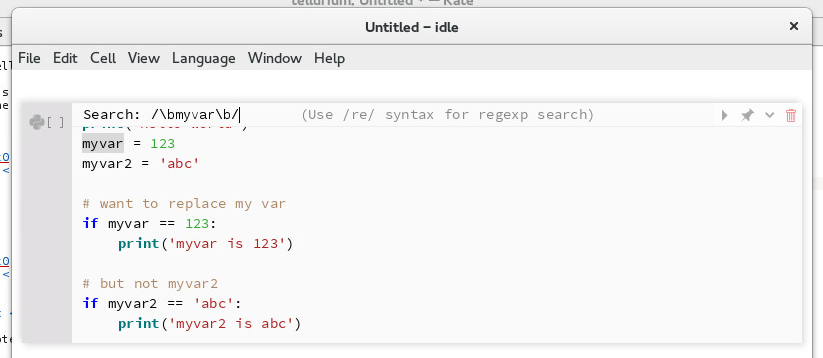
To search for text in a notebook cell, use ctrl+F. To search for whole-words only, use /\bmyword\b where myword is the word you want to search for.
Searching for whole words
To search and replace, use ctrl+shift+R. For example, to replace myvar but not myvar2 (i.e. whole-word search & replace) in the code below, press ctrl+shift+R, enter /\bmyvar\b/ for the search field and newvar for the replace field. The result is that all instances of myvar are replaced, but not myvar2:
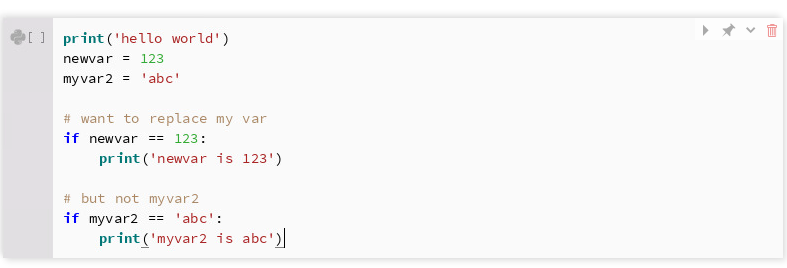
Search & replace demo with whole words
Example Notebooks
Tellurium comes with many example notebooks showing how to use its various features. To access these notebooks, use the File -> Open Example Notebook menu. Tellurium comes with five example notebooks:

Opening example notebooks
The Quickstart notebook contains the Quickstart example from this documentation, using the SBML cells of the Tellurium notebook viewer.
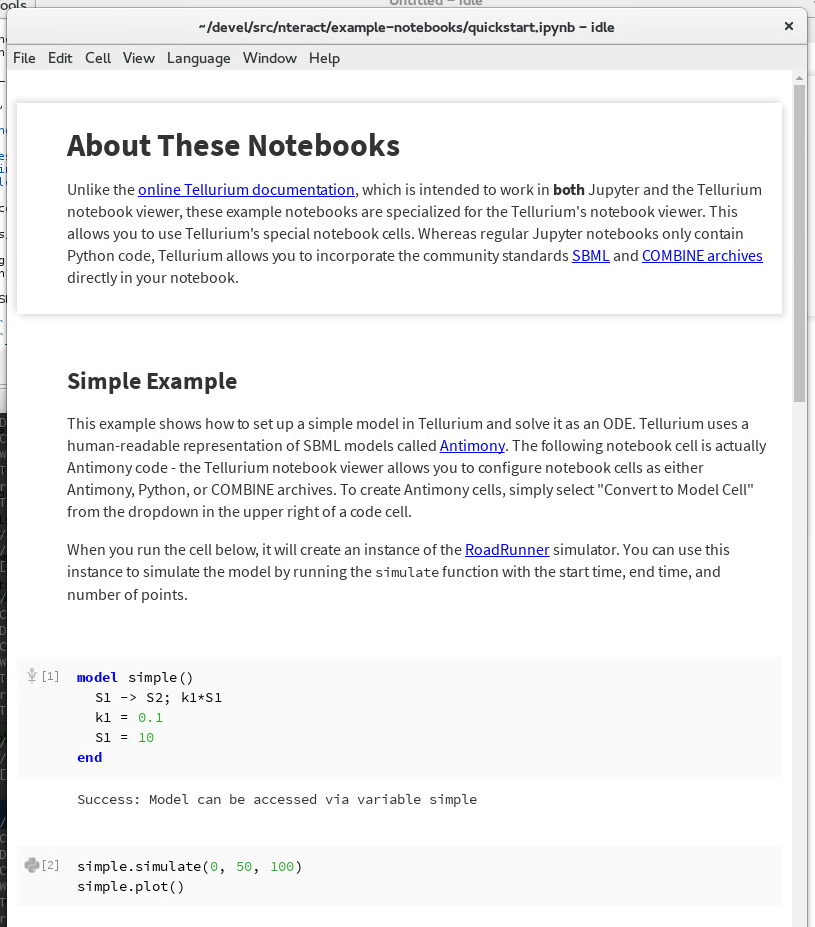
Quickstart example notebook
Exporting to Jupyter
Tellurium notebooks can contain special cell types such as the SBML or OMEX cells described above. These notebooks cannot be properly read by Jupyter. However, you can export these notebooks to Jupyter by choosing File -> Export to Jupyter... from the menu. You will notice that the exported notebooks contain special cell magics such as %%crn and %%omex. To run these notebooks in Jupyter, install the temagics package in addition to tellurium using pip.
Advanced Topics
Using Other Jupyter Kernels / Languages
A built-in Python 3 kernel is provided with the notebook app. However, there are cases where this is not enough. Tellurium owes its existance in part to great free / open-source projects like nteract. We recommend anyone interest in a general-purpose notebook environment consider nteract instead.
Nevertheless, sometimes using a kernel other than the built-in Python 3 kernel is necessary. Starting with version 2.0.14, Tellurium supports automated discovery of other Jupyter kernels, such as different Python versions and distributions (e.g. Anaconda) and other languages (the Tellurium packages are not available in other languages). The following example shows how to use an R kernel with Tellurium.
- First, follow the installation instructions for the IRkernel (see also). These instructions use R 3.3.0. The following procedure for installing the IRkernel works for us:
install.packages('devtools')
install.packages(c('repr', 'IRdisplay', 'evaluate', 'crayon', 'pbdZMQ', 'devtools', 'uuid', 'digest'))
devtools::install_github('IRkernel/IRkernel')
- Make sure the IRkernel is registered:
IRkernel::installspec()
- Start the Tellurium notebook app. Under the
Languagemenu, selectFind Kernels.... A pop-up with aScanbutton should appear. Click theScanbutton. The results of the scan show all the kernels available to Tellurium. The built-in Python 3 and Node.js kernels are always available. Additional kernels appear based on installed Jupyter kernels. If you don’t see a Jupyter kernel you want here, make sure you have correctly installed the kernel (each his its own set of instructions). If the kernel still does not show up, make sure it is a true Jupyter kernel. Older IPython-based kernels (i.e. kernels which install under~/.ipythoninstead of~/.jupyter) cannot be discovered by Tellurium.
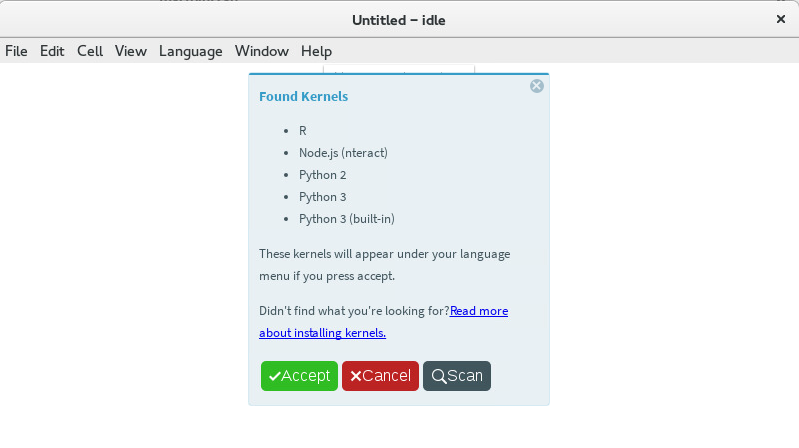
Displaying the available kernels after a scan
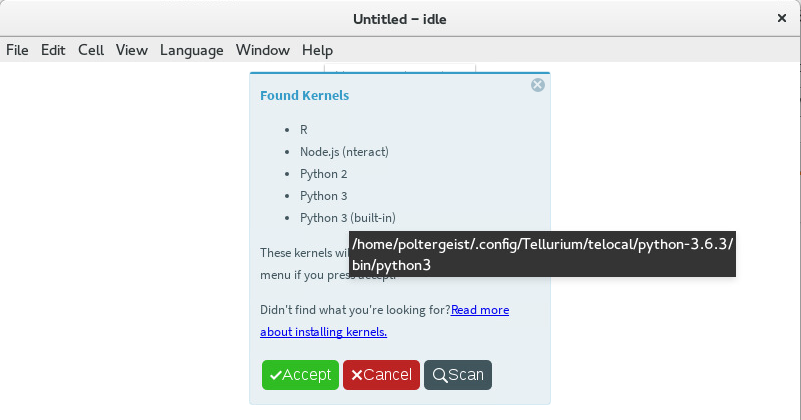
- Sometimes the path to a kernel’s executable can be displayed by hovering over the kernel’s name. The R kernel you installed should appear in the list. Click the accept button to cause the
Languagemenu to be updated with the new kernel choices.
Hover over the name of a kernel to display its path
- By selecting
Language->R, you can cause the notebook to switch to the IRkernel. All code cells will be interpreted as R (SBML and OMEX cells will not work).
Demo of running an R kernel in Tellurium
Notebook Troubleshooting
Problem: Cannot Load Kernel
The notebook viewer ships with a Python3 kernel, which causes problems when trying to open a notebook saved (e.g. by Jupyter) with Python2.
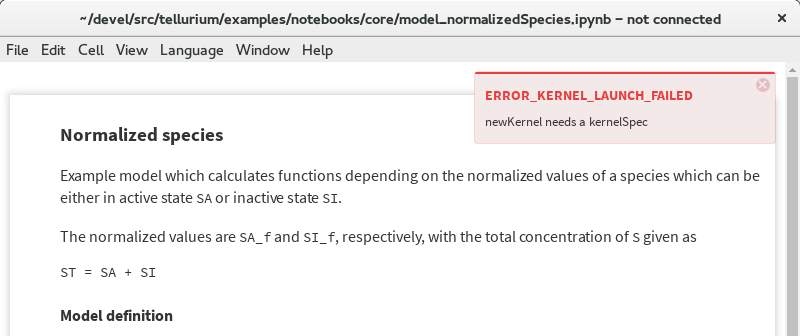
Error message when kernel cannot be loaded
Solution
In such a case, simply replace the kernel by choosing Language -> Python 3 from the menu.
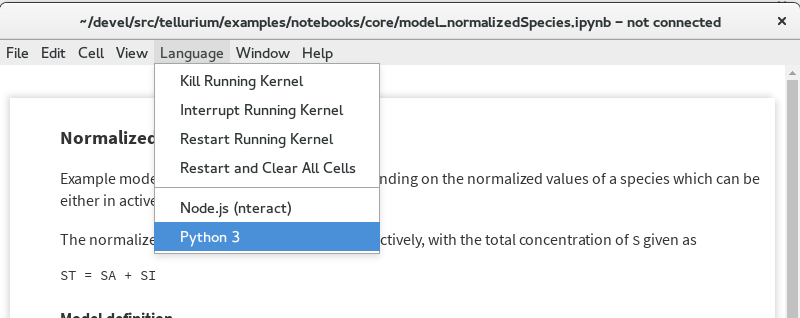
Fix for kernel loading problem
Problem: Saving the Notebook Takes Forever
Solution
When highly detailed / numerous plots are present, Plotly is known to slow down notebook saving. In such cases, you can switch to matplotlib instead of Plotly by calling import tellurium as te; te.setDefaultPlottingEngine('matplotlib') at the beginning of your notebook. When using matplotlib for plotting, the long save times do not occur.
Alternatively, choose Language -> Restart and Clear All Cells to save the notebook without output.
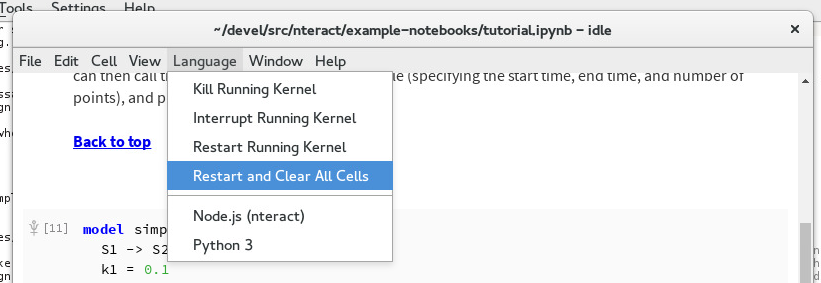
Reset and clear all cells
Further Reading
- Tellurium notebook is based on the nteract app.
- Jupyter.
IDE Walkthrough
If you have not already done so, download and install the Tellurium Spyder IDE front-end for your platform (only for Windows, legacy versions supported Mac).
Basics
Tellurium Spyder is based on Spyder IDE, a popular open-source integrated development environment for Python. Tellurium Spyder offers experience akin to MATLAB, allowing you to view, edit, and execute Python scripts through dedicated editor and console windows. Addtionally, Tellurium Spyder comes with various tools to help you code. When you first open Tellurium Spyder, you will be greeted by an editor pane with example script, an IPython console, and a Help pane. You can execute the script in the editor pane directly on the IPython console by:
- Pressing the green arrow
- Pressing
F5 - Pressing
Run->Run
The example script contains an oscillation model. When you run the script, a plot will appear in the IPython console as the output.
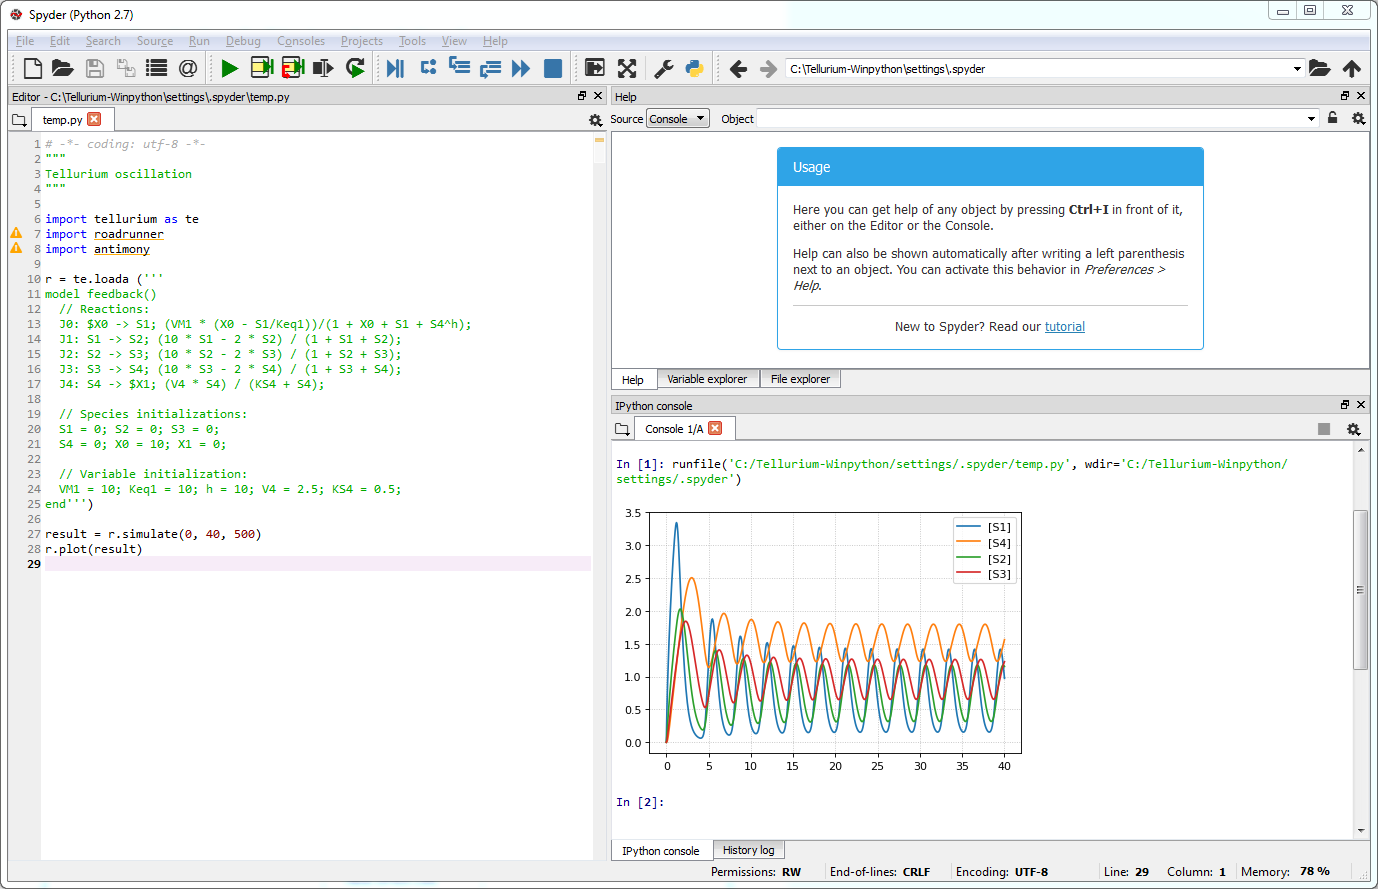
Output of running the example script
For more information on how to build and simulate a model, check Quick Start and libRoadRunner Tutorial.
Creating and Running Cells
Similar to Jupyter notebook, Spyder IDE allows you to create cells. To create a cell, simply put #%% in the script. Each #%% will signal generation of a new cell. To run a cell, press shift+enter while in focus of a cell. If you want to run only part of a script, you can do it by drag-selecting the part and pressing F9.
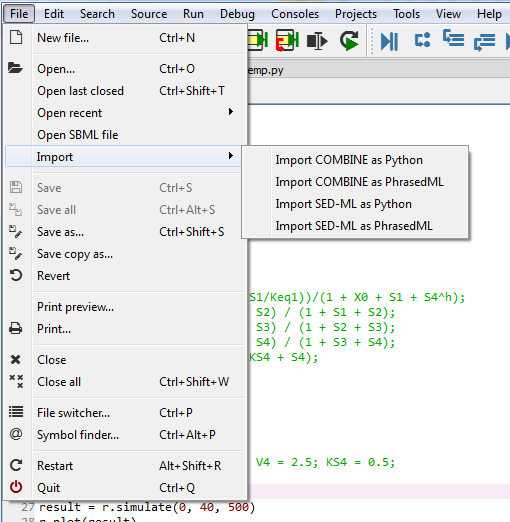
Importing Files
Tellurium Spyder comes with few plugins to help you import SBML, SED-ML, and COMBINE archives. Under File menu, press Open SBML file to open an SBML file and automatically translate it into Antimony string in a new editor tab. To import SED-ML or COMBINE archive, go to File -> Import. You can import SED-ML or COMBINE archive using either phraSED-ML notation or raw Python output. Tellurium understands phraSED-ML notation.
Importing SBML, SED-ML, and COMBINE archives
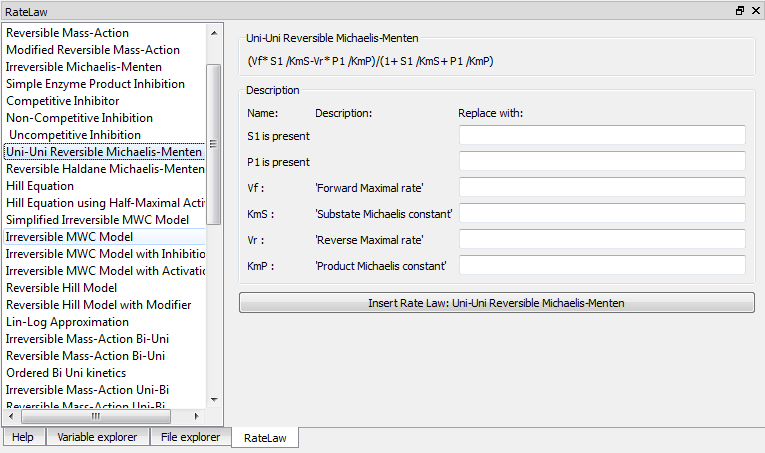
RateLaw Plugin
Tellurium Spyder comes with RateLaw plugin. RateLaw plugin contains a list of various rate laws and allows users to insert rate laws directly to the editor. Simply put, it is a dictionary of rate laws so that you don’t have to memorize it. To use it, go to Tools -> Rate Law Library. You can then choose a rate law, fill in the parameters if you wish, and press Insert Rate Law.
RateLaw Plugin
Spyder Tips
Both the editor and console window support tab completion. If you are looking for certain functions under a module or a class, simply press tab.
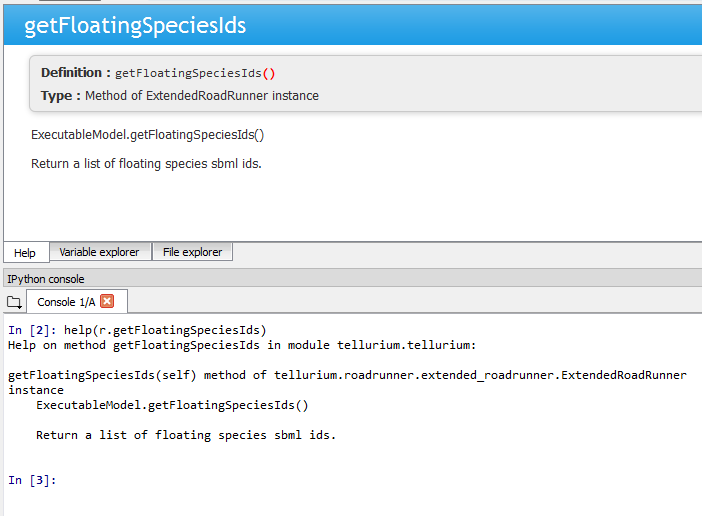
Spyder IDE also supports various ways to check the documentations. If you wish to know more about a function, press ctrl+i while the cursur is next to the function to pull up the documentation in the Help window or execute help(<function>) in IPython console. You can also use <function>? to know more about the object itself. IPython offers various IPython-specific magic commends. Check it out by running ? without any arguments in the IPython console.
Pulling documentation in the Help window or through IPython console.
Sometimes, IPython console might crash. Sometimes, you might want to restart the console to free up some memory. Yes, these things happen unfortunately. To researt the console, simply press ctrl+. in the console or right click -> Restart kernel. While doing so, you will notice that you can open another IPython console as well.
Advanced Topics on Tellurium Spyder
Running Jupyter Notebook
Tellurium Spyder comes with Jupyter Notebook by default. To run it, go to Start Menu -> Tellurium Winpython -> Launch Jupyter Notebook or go to Tellurium Spyder installation directory and run Jupyter Notebook.exe.
Running Command Prompt for Tellurium Spyder
Sometimes, you might want to run a Windows command prompt with the Python that comes with Tellurium Spyder as the default Python distribution. This can be useful if you wish to install addtional Python packages with more control. To do so, go to Start Menu -> Tellurium Winpython -> WinPython Command Prompt or go to Tellurium Spyder installation directory and run WinPython Command Prompt.exe.
Running JupyterLab
Tellurium Spyder comes with JupyterLab by default. To run it, go to Start Menu -> Tellurium Winpython -> Launch JupyterLab or go to Tellurium Spyder installation directory and run Jupyter Lab.exe. For more information on JupyterLab, go to Official JupyterLab Documentation.
Tellurium Spyder Troubleshooting
Problem: IPython Console Crashed
When this happens, IPython will automatically recover most of the times. If it does not, manually restart the IPython console using ctrl+. or right click -> Restart kernel.
Problem: Cannot Open Tellruim Spyder
When Spyder IDE crashes, it will automatically try to recover on the next execution. However, if this does not happen, manually run the reset script. To do so, go to Start Menu -> Tellurium Winpython -> Reset Spyder or go to Tellurium Spyder installation directory and run Spyder reset.exe. If Spyder still does not open, we suggest you to clean re-install Tellurium Spyder.
Further Reading
Additional Resources for Tellurium
- For general questions or to request help, please post to the Tellurium-discuss mailing list.
- Herbert Sauro’s modeling textbook, which uses Tellurium
- YouTube video tutorials (made prior to Tellurium notebook).
Learning Python
- Google’s Python class.
- Official tutorial for Python 2 and Python 3.